RaccNRun
Devlog 2: Design and Prototyping
A new week means a new Monday, and a new Monday means a new Devlog!
Having developed a solid idea of what the game is about, this last week has been dedicated to the art bible for the art style, the design document to write down and elaborate on the mechanics and gameplay, and naturally - prototyping.
Art: Level Layout and Character Design, brought to you by Jens de Brabanter
This week, I focused on designing the level layout for our game, which takes place in a museum. Before diving into development, I carefully considered several key aspects to ensure the level would be engaging, balanced, and visually clear for couch co-op gameplay.
One of the primary considerations was the level's size. It needed to be spacious enough for players to maneuver, evade the guard, and interact with each other, but not so large that it became difficult to read on a shared TV screen. Since players need to track their characters and the environment at all times, I experimented with different layout sizes to find the optimal balance between readability and gameplay space.
Another important aspect was the spawn and drop-off points for stolen loot. Each player has their own designated corner of the map, color-coded to match their character. This makes it easy to identify where to return items while also giving each player a clear starting position.
To maintain fairness, I designed the layout symmetrically, ensuring no player has an inherent advantage. However, I introduced variations in elevation using steps to break the symmetry and add more depth to the gameplay. The room layout allows for free movement, but strategically placed walls, objects, and pillars create opportunities for players to hide, evade, and strategize against each other and the guard.
Beyond the core level, I also considered the surrounding environment. The museum is located in an alleyway or street, which will be added later for aesthetic purposes. To make the building feel unique, I avoided a standard rectangular shape, adding architectural variation.
Color usage played a key role in defining the level’s visual clarity and gameplay elements. The floors and walls are a beige-white to provide a neutral base, while red carpets segment the rooms and guide players along key paths. Gold and brown accents highlight interactive and valuable objects, making it easier for players to identify targets during the game.
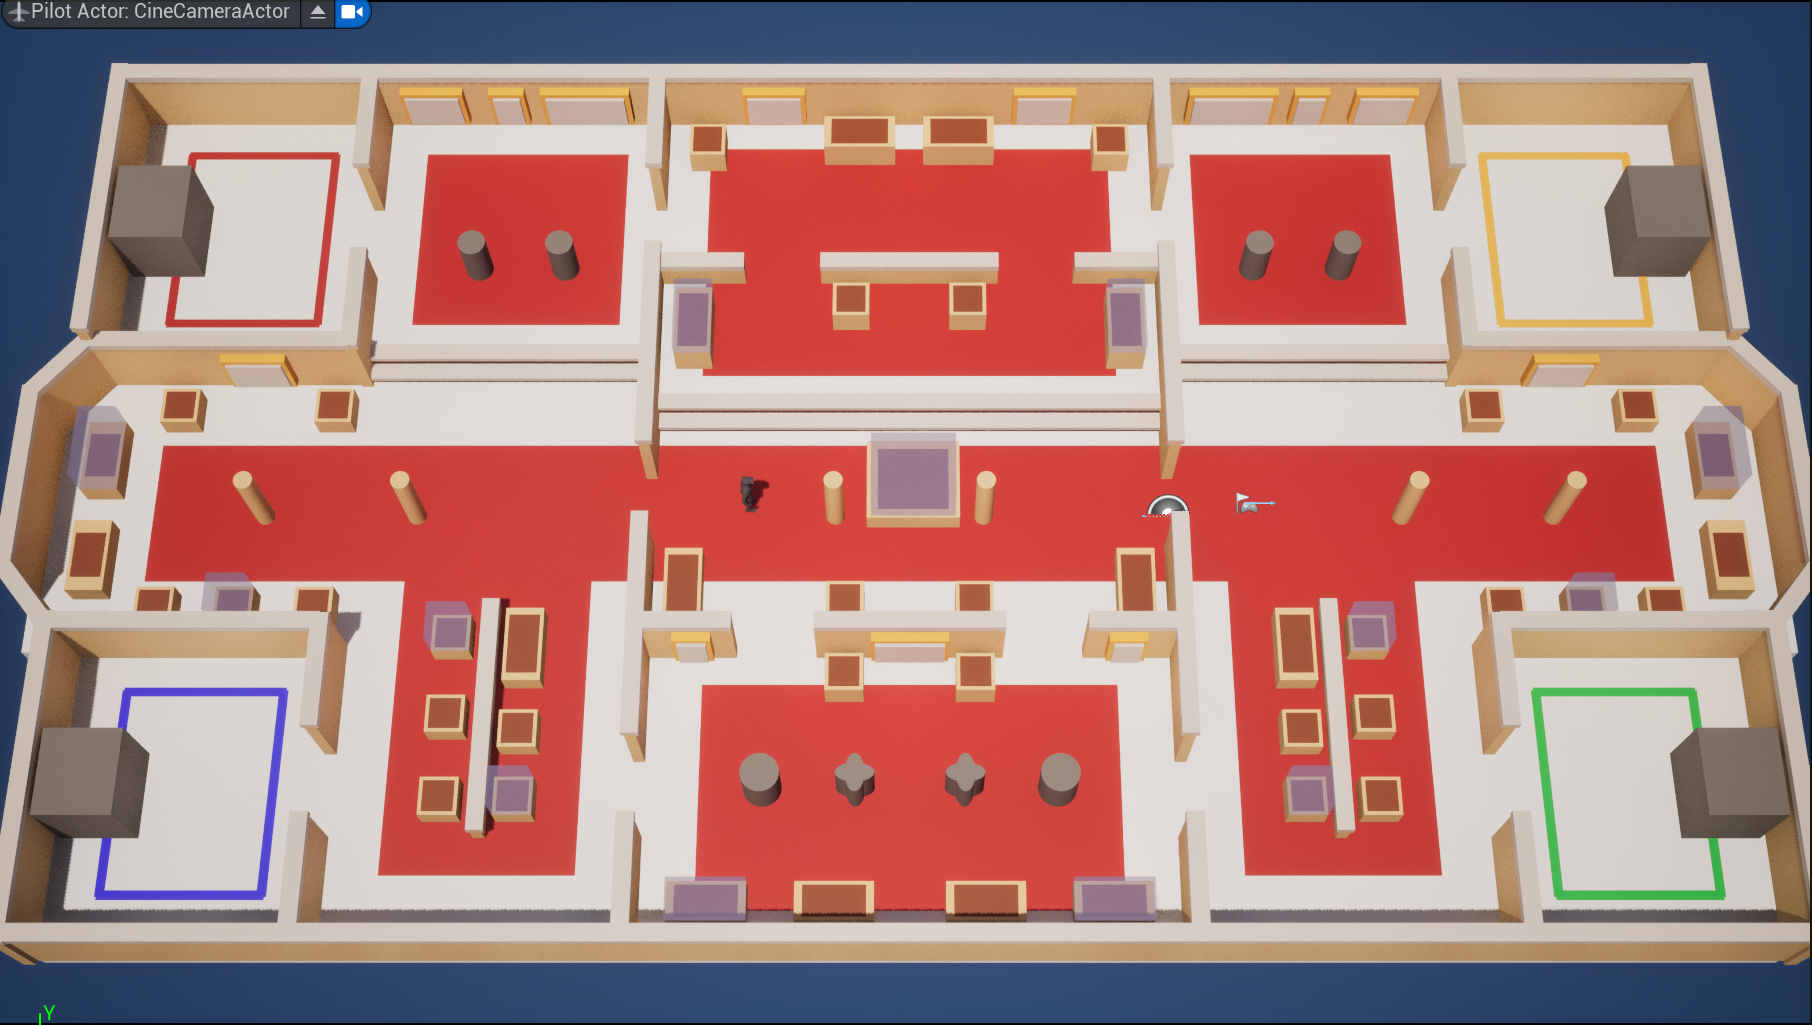
Fig. 1 - Level layout testing
In addition to the level design, I also worked on character design. The player-controlled character is a raccoon thief with a cylindrical, bean-like shape that fits the playful style of the game. He wears gloves and a mask that change color based on the player’s assigned color, ensuring clear identification on screen. His body remains in grayscale, resembling a real raccoon while avoiding unnecessary visual clutter.
For the enemy guard character, I designed him to feel heavier and more intimidating while still fitting the game’s lighthearted style. He has a rounder shape, giving him a slightly clumsy but imposing presence. His eyes are hidden beneath a thick unibrow, reinforcing his stern, unreadable expression. To distinguish him from law enforcement, I chose a green jacket that aligns with the museum guard theme while also making him stand out against the red carpets in the level.
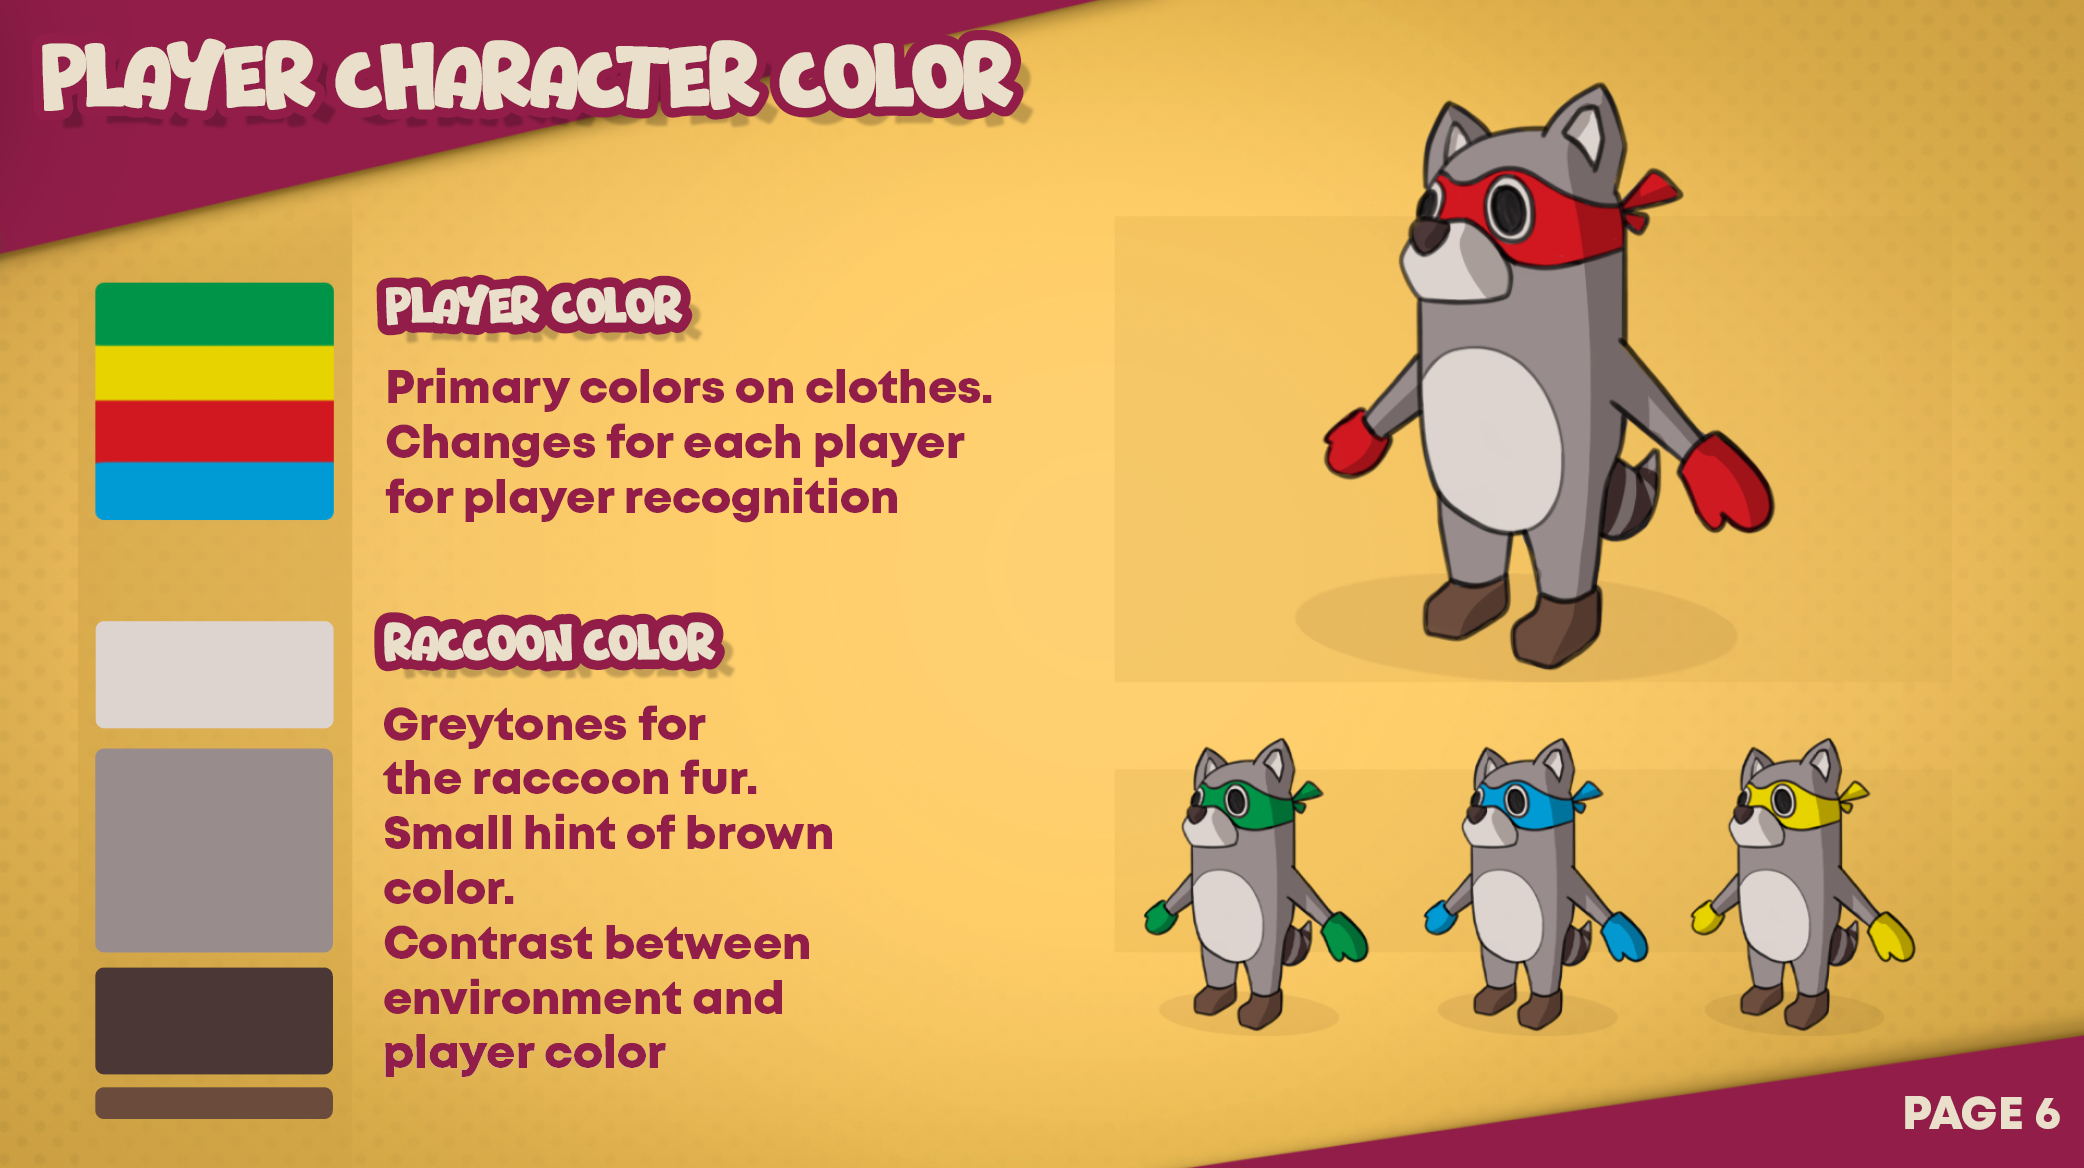
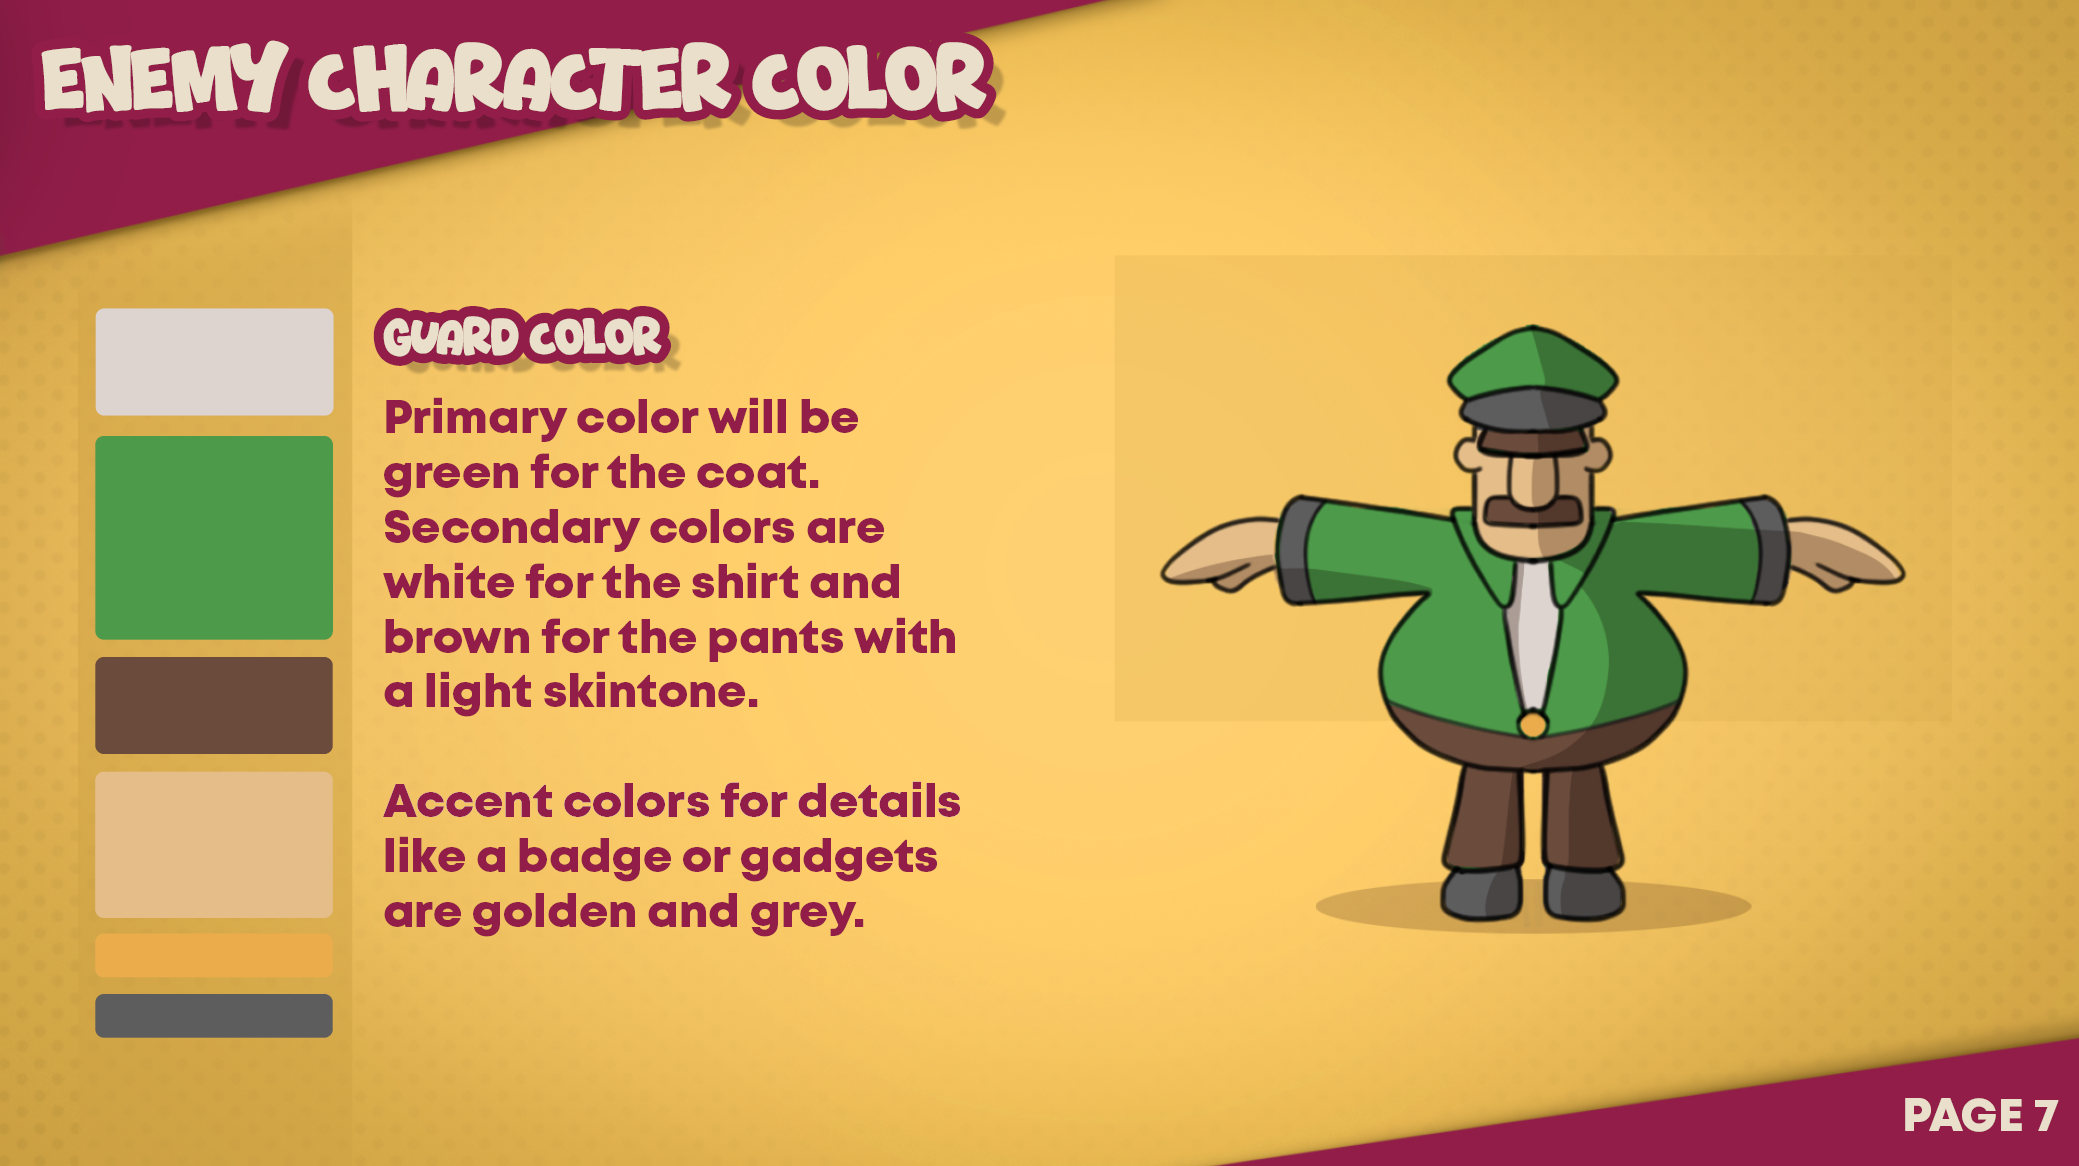
Fig. 2 and 3 - Main character and the guard
I also carefully considered the size and proportions of the characters relative to the level. The raccoon thief is the smallest, standing just above a meter tall, emphasizing his speed and cunning nature. In contrast, the guard is exactly two meters tall, making him feel more imposing. Objects within the level are scaled appropriately so that both characters feel natural within the environment. The walls are slightly taller than the guard to maintain a sense of enclosure without obstructing the player's view of the floor, ensuring clear visibility of characters and interactive objects.

Fig. 4 - Proportions lineup
Art: Toon and Cell Shaders, and Mixamo brought to you by Hendrik Sapyn
I've been diving into shaders, specifically working on a good-looking toon/cel shader. My initial approach was to look for existing shaders online, but I ran into some issues. The Unreal Marketplace recently transitioned to FAB, and many store pages haven't been migrated by their original developers. I did find one shader, but it was just an outline effect—lacking cel shading—and the outline itself was too buggy. Most other options were locked behind a paywall.
Next, I turned to YouTube for tutorials. After some research, I noticed that many videos followed the same methods, but they seemed overly destructive. Eventually, I came across the perfect tutorial (link), which not only explained the process in depth but also covered alternative approaches and why they weren’t ideal. I decided to follow this tutorial, making a few small modifications to fit our needs. For now, the prototype looks promising.
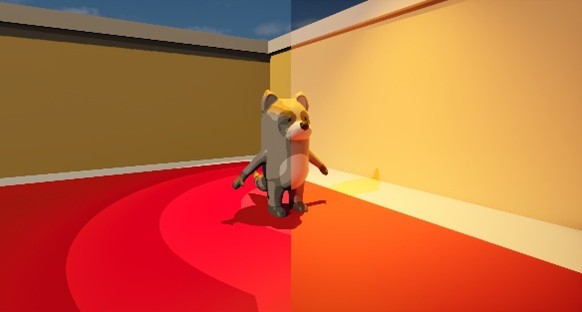
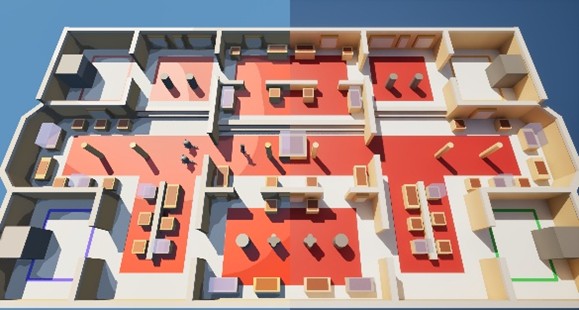
Fig. 5 and 6 - Shaders versus standard rendering
I still plan to add an outline shader on top of it. While a paid option exists, there's also a tutorial that involves some coding, which I’ll explore later in production. The shader is highly adjustable and reacts well to colored lights—exactly what I was aiming for.
For animation, we decided to use Mixamo since none of us have much experience with animating. Our first test was to see if a raccoon model would work with Mixamo’s auto-rigger. Right away, I noticed an issue—the tail wasn’t rigged properly. This makes sense since Mixamo’s system isn’t designed to handle tails.
Thankfully, it was an easy fix. I imported the rig into Maya and manually adjusted the joint weights. By selecting the bottom spine joint (the closest attachment point to the tail), I was able to repaint the weights and properly rig the tail.
After importing the fixed rig into Unreal, the difference was clear. An added bonus is that I can now reimport the fixed rig back into Mixamo and reuse it for other animations, making future animation work much smoother.
Fig. 7 - Animation testing
Art: Lighting and Character Indicators
In the meanwhile, our wonderful Michał Galas , the third artist in our team, has been hard at work testing lighting setups in terms of mood, visibility, and readability. In keeping with the heist theme of the game, he is checking the viability of having a night-time setting and lighting that will still allow for a bright color palette and easy to parse visuals, but make it clear what time of day - or, rather, night - it is. Since it is a museum heist, it would be strange to have it during the day - but making it work may be a challenge, so he is prototyping whether it is an achievable balance!
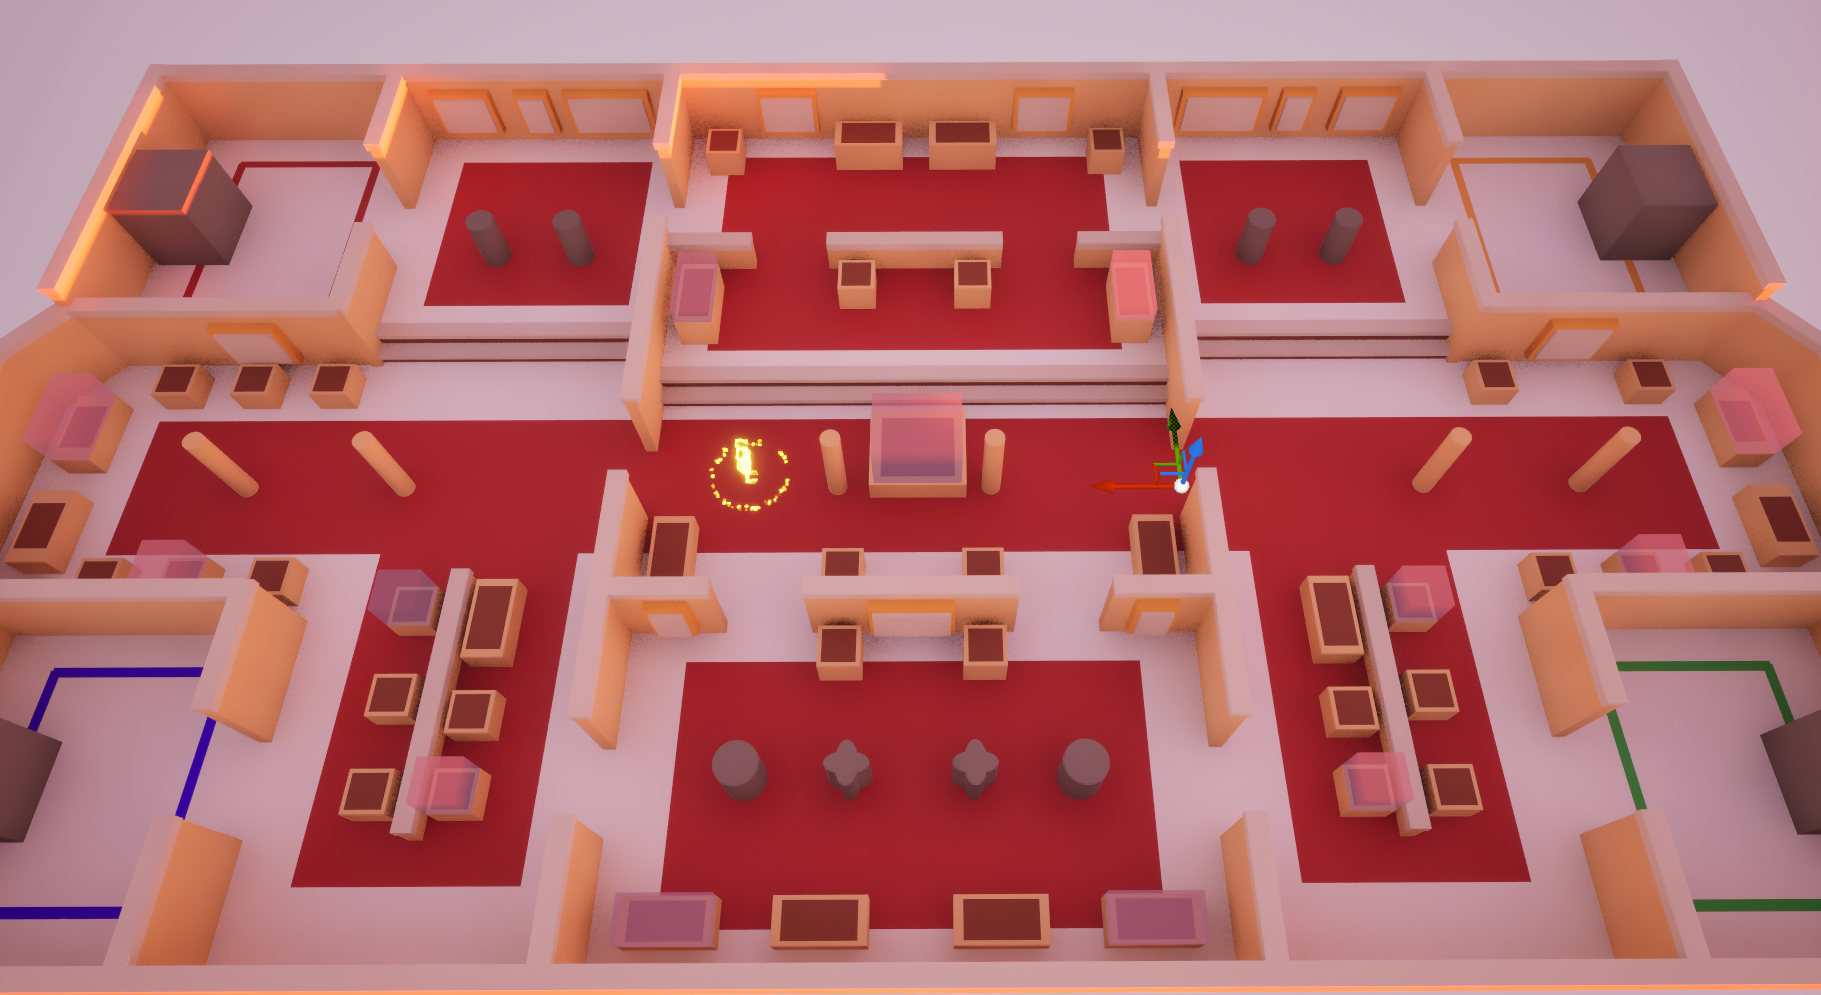
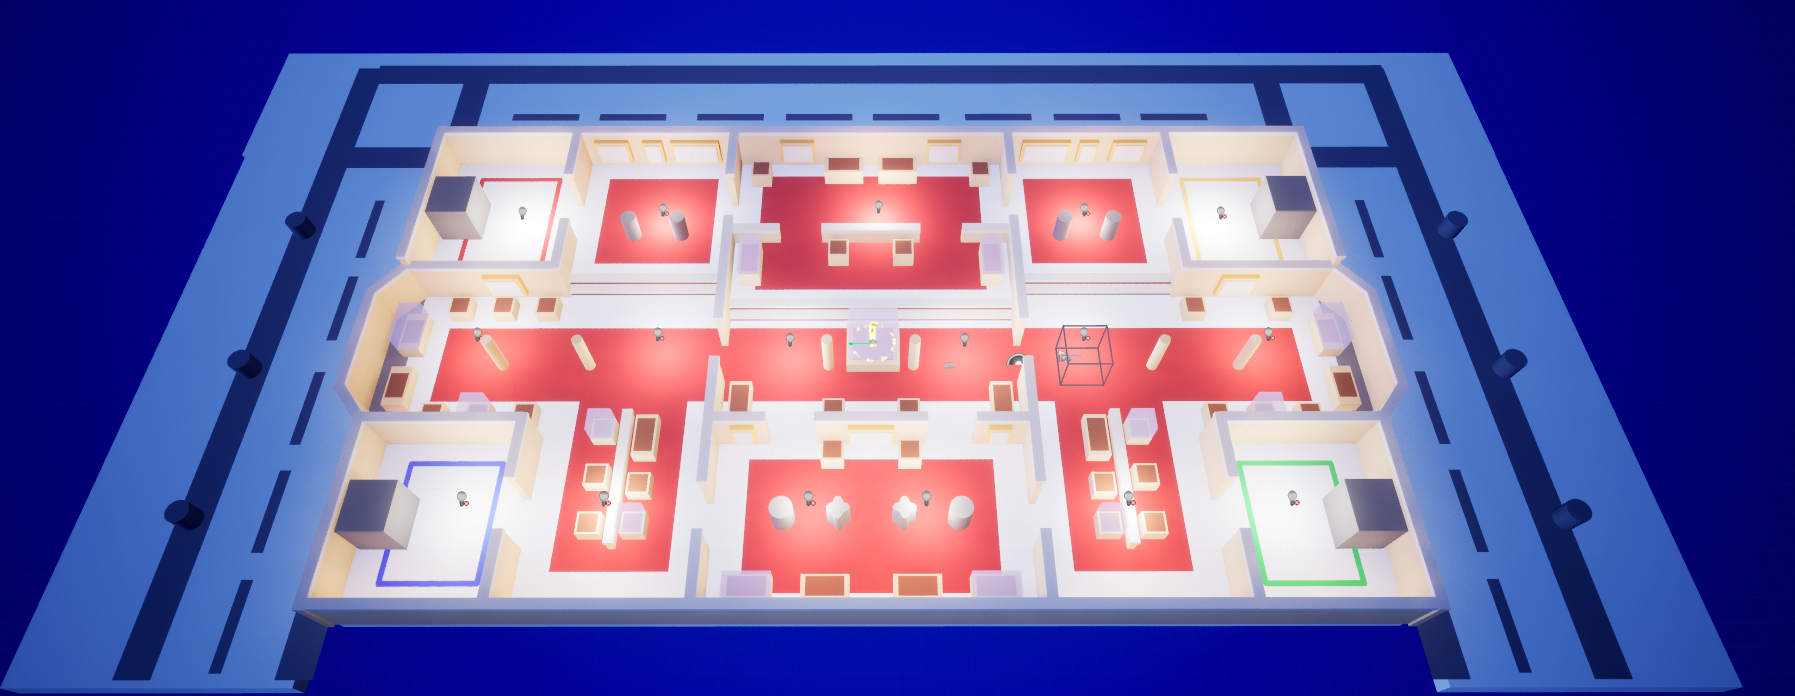 Fig. 8 and 9 - lighting tests
Additionally, he is also working on prototyping how to make characters easy to track on screen even when they are obscured by walls or furniture - as the camera will be located at a fixed angle, there will be moments where the camera may not see all of the players. His current approach to this question involves experimenting with post processing materials to create a highlight around the character, as well as show a simple silhouette through the blocking objects.
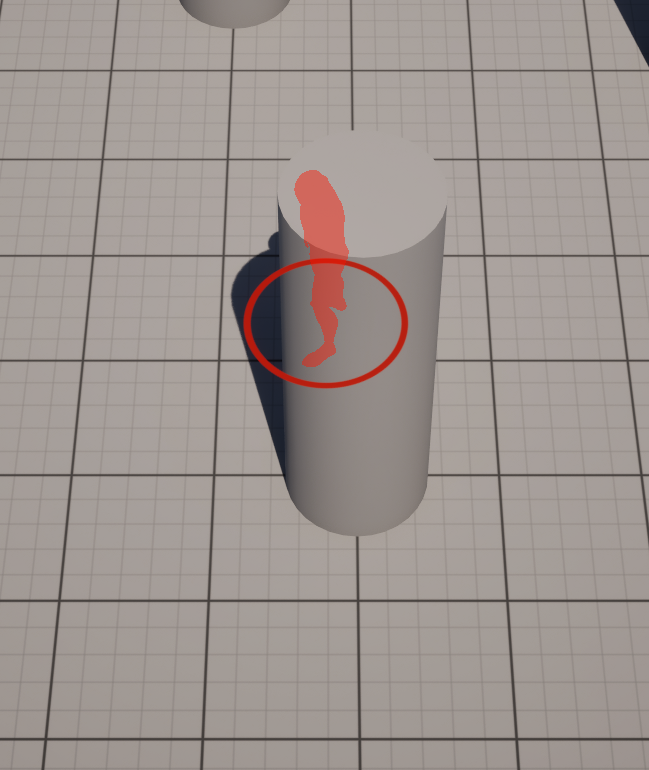
Fig. 10 - Player outline testing
Programming: AI and Main Mechanics continued
Following on from the work from last week, the programmers are continuing to work on the main mechanics for the game. Aslan Aouchev is responsible for the experiments regarding how to make the AI notice the sounds that are caused by the players, or by things thrown by the players to make a noise at a specific location; Sasha Hlebov is busy testing the feel of controlling the character in the newly-created level blockout, as well as the mechanic of knocking a fellow player out by throwing a heavy item at their head.
After these are sorted out, the question of camera set-up and whether to make it splits-screen or not, fixed zoom or zoom-based-on-player proximity will be addressed - and, of course, the mechanics of running around and throwing things everywhere will be tested for ways to make them evermore fun and engaging.
A little sneakpeak behind the scenes...
Here's the design model we are working on in hacknplan! Very much a work in progress.

Leave a comment
Log in with itch.io to leave a comment.